When I was pregnant with my first child, my gallbladder went incredibly freaky on me. I couldn't eat more than 3g fat at one sitting or else I would end up in excruciating pain. Not fun to deal with when one is hugely pregnant. Well, things didn't get any better after she was born (it actually got worse and I had surgery 8 weeks after she was born). A friend of mine from church brought us a meal that has become a staple around here as my husband and I both like it. It's light, easy and tastes good!
I have to admit that one time when I made it, I'd forgotten to buy the tomatoes and green peppers - so I grabbed two cans of Rotel from the pantry. We liked it just as well, even though it totally changes the dish (makes it spicy) - also since I'd used Rotel we skipped the Parmesan cheese. More often than not, I still make it with Rotel rather than tomatoes and green peppers. I made it tonight for dinner without the Rotel. Our oldest daughter prefers it made with the tomatoes and green peppers. She was hesitant to take a bite of it at first, but once she did - I got the thumbs up from her. "Make it this way all the time, Mom!"
No photos, too much other stuff going on, sorry gang!
Here is the recipe - from the December 2001 issue of Cooking Light magazine. You can get the nutritional information here if you're interested in it.
Yield
4 servings (serving size: 2 cups)
Ingredients
* 4 (4-ounce) skinless, boneless chicken breast halves
* 1/8 teaspoon salt
* 1/8 teaspoon black pepper
* 1 tablespoon olive oil
* 3/4 cup chopped onion
* 1 garlic clove, minced
* 1 1/2 cups fat-free, less-sodium chicken broth
* 2 (14 1/2-ounce) cans diced tomatoes with onions and green peppers, drained
* 4 cups fresh spinach
* 1 tablespoon chopped fresh basil
* 1 tablespoon butter
* 4 cups hot cooked ziti (short, tube-shaped pasta)
* 1/4 cup (4 ounces) grated fresh Parmesan cheese
Preparation
Cut chicken into 1-inch pieces, and sprinkle with salt and pepper.
Heat oil in a large nonstick skillet over medium-high heat; add chicken, onion, and garlic. Sauté 5 minutes, stirring frequently. Stir in broth and tomatoes. Bring to a boil; reduce heat and cook 5 minutes, stirring occasionally. Add spinach, basil, and butter; cook 2 minutes.
Toss chicken mixture with pasta, and top with cheese.
Tuesday, December 9, 2008
Wednesday, December 3, 2008
Want to win some chocolate?
Marye at Baking Delights is giving away a basket of chocolate from Hershey's and all you have to do to win is comment on her post here! She gives several other ways that you can earn bonus entries as well - blogging about the contest is a way to earn another entry. :)
Saturday, November 29, 2008
Daring Bakers: Caramel Cake with Browned Butter-Caramel Icing
 edited to add: Pilgrims and Indians were made by my oldest daughter and me a couple of years ago (when she was three). I got the idea out of Family Fun magazine (my favorite magazine on the planet, I think). You can find them here should you wish to recreate for your own table next year. :)
Oh. My. I love the flavor of caramel and I like browned butter - combine the two - and well, as my 4-year-old says, "It was deee-yi-cious!!" The Daring Bakers had a great challenge for November. Just ask my waistline!
Dolores of Culinary Curiosity was our host this month. Co-hosts were Alex (Brownie of the Blondie and Brownie duo), Jenny of Foray into Food. And Natalie of Gluten-a-Go-Go was the go-to-girl for info on alternative baking.
Our hosts this month chose Shuna Fish Lydon's signature caramel cake (this is where you'll find the recipe for the cake -- QUICK -- GO THERE! You want to make this cake!!!!) We also had an optional challenge: Alice Medrich’s Golden Vanilla Bean Caramels which I did not do since it was optional and my life is insane at the moment.
The first step in making this cake is to make a caramel syrup. This requires cooking sugar and water on the stove, waiting for it to turn an amber color and then pouring cold water into it. The recipe warns of splatters. I am (a) chicken of splatters (which is yet another reason we never have fried food in this house - I cook my bacon in the oven) and (b) often surrounded by little people when I'm in the kitchen. The idea of something hot and sticky splattering everywhere, when two of my little people recently ended up with 2nd degree burns thanks to hot tea....not something I was looking forward to. However, one of the other Daring Bakers, Linda, shared a tip about making the caramel syrup:
When I was ready to pour the water into the bubbling caramel syrup, I took a piece of aluminum foil, cut a quarter-sized hole in the center and placed it over the pot of boiling syrup. Then I slowly poured the cold water through the hole. Worked like a charm. Not a splatter outside the pan or on my hand.I used that tip and it was definitely a great one, especially since Elizabeth and Annie were in the kitchen with me while I was making it.
I made this cake for dinner with three other couples and it was well received. I have to admit being very nervous as I'd not tasted it before. When I cut it at Janet's I dished some onto a plate and said, "Let me take a bite of this before you give any other pieces out! If I messed it up, we'll eat the apple pie Teresa brought!" But...mmmm...good cake! Dense, moist - very good. The icing was rich but not too sweet. No photos and we devoured the cake, then what was left over, my girls had for breakfast on Saturday morning. (yeah, cake for breakfast -- but then their morning snack was no-sugar-added organic applesauce so we made up for it)
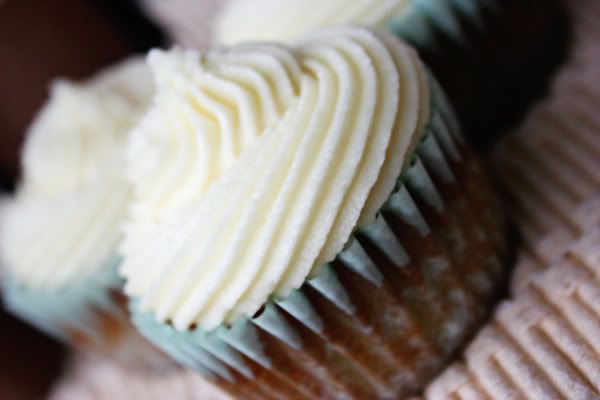 I'd also volunteered to take a dessert to choir retreat at the church on Saturday (our church choir spends one day hammering out Christmas music in order to not have to add additional rehearsals during the holiday season). After tasting the cake I decided I'd do the same recipe as cupcakes. The recipe made 21 cupcakes - perfect! 18 for choir retreat and one for each of my girls. I filled the cupcake liners two-thirds full, baked them at 350 for about 13 minutes. They were delicious! I will definitely be making this cake again. And again. And again! Even my husband, who doesn't really like cake, liked it!
Be sure to check out how other Daring Bakers fared - and I know some make the caramel candies, too. Mmmm! You'll definitely want to check that out!
Tuesday, November 11, 2008
Win some Pace Salsa
If you like Pace Salsa (I'm a little addicted to my husband's) you should visit Linette over at She Knows Parties. She's having a give away of a very nice Pace Salsa Assortment.
And, ahem...check this out. How cool is THAT?! I squealed. Loudly. And I'd had such a crappy day that I almost couldn't believe it! That's also why I'm not entering the Pace Salsa giveaway. :) No need to snap up all the goodies!
And, ahem...check this out. How cool is THAT?! I squealed. Loudly. And I'd had such a crappy day that I almost couldn't believe it! That's also why I'm not entering the Pace Salsa giveaway. :) No need to snap up all the goodies!
Sunday, November 2, 2008
A contest you can enter
Don't I wish I had a cool give away...but alas it isn't me. It's over at She Knows Parties and she's giving away a NESCAFE Dolce Gusto. It's a single cup brewer from Nescafe and Krups. It is nifty looking and would be a great addition to your kitchen. All you have to do to enter is comment on Linette's post - here. There are a couple of ways to earn additional entries if you're so inclined. :) Good luck if you enter!
Saturday, November 1, 2008
Daring Bakers: Whoops! I'm LATE!
I am such a bad girl! This was supposed to have been posted on Wednesday and life caught up with me...eek!
October's hostess was Rosa's Yummy Yums. She was originally slated to hostess with a couple of other ladies - one of them was Sher, who sadly passed away in July from a massive MI. As a tribute to Sher, Rosa elected to continue with the idea Sher had about the challenge for October. Pizza dough! We've recently ventured into the world of homemade pizza dough (sourdough and in the bread machine) but Rosa was having none of that. ;) We had to actually toss the dough this time! We were unable to get pictures and I have a lot of practicing to do!!
RECIPE SOURCE: “The Bread Baker's Apprentice: Mastering The Art of Extraordinary Bread” by Peter Reinhart. Ten Speed Press, Berkeley, CA. Copyright 2001. ISBN-10: 1-58008-268-8, ISBN-13: 978-158008-268-6. You can see the recipe here, on Rosa's blog.
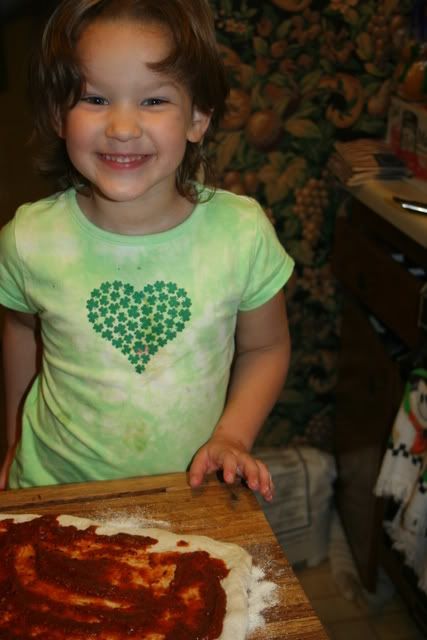
We used homemade pizza sauce (recipe here), ground beef, cheese and caramelized onions (mmmm!). I had a lot of help in making the pizza, as usual. Brad caramelized the onions because he loves to do that and because he can't stand to be left out of any part of preparing dinner. Katherine helped put the meat and cheese on the pizzas. I told Brad that the next time we make pizza using caramelized onions we're leaving off the sauce because it totally overpowered the onions. By the way, if you've never had caramelized onions on a pizza...oh my gracious...what are you waiting on?! Yummy!


For more pizza ideas and quite possibly photos of folks tossing their pizza dough - check out other Daring Bakers!
October's hostess was Rosa's Yummy Yums. She was originally slated to hostess with a couple of other ladies - one of them was Sher, who sadly passed away in July from a massive MI. As a tribute to Sher, Rosa elected to continue with the idea Sher had about the challenge for October. Pizza dough! We've recently ventured into the world of homemade pizza dough (sourdough and in the bread machine) but Rosa was having none of that. ;) We had to actually toss the dough this time! We were unable to get pictures and I have a lot of practicing to do!!
RECIPE SOURCE: “The Bread Baker's Apprentice: Mastering The Art of Extraordinary Bread” by Peter Reinhart. Ten Speed Press, Berkeley, CA. Copyright 2001. ISBN-10: 1-58008-268-8, ISBN-13: 978-158008-268-6. You can see the recipe here, on Rosa's blog.
We used homemade pizza sauce (recipe here), ground beef, cheese and caramelized onions (mmmm!). I had a lot of help in making the pizza, as usual. Brad caramelized the onions because he loves to do that and because he can't stand to be left out of any part of preparing dinner. Katherine helped put the meat and cheese on the pizzas. I told Brad that the next time we make pizza using caramelized onions we're leaving off the sauce because it totally overpowered the onions. By the way, if you've never had caramelized onions on a pizza...oh my gracious...what are you waiting on?! Yummy!
For more pizza ideas and quite possibly photos of folks tossing their pizza dough - check out other Daring Bakers!
Sunday, October 19, 2008
Parchment Paper on the cheap!
I love to bake, remember (see up there in the header in case you've forgotten - my favorite line from High School Musical). So, one day while reading some of the blogs I stalk I found a link to Reynolds' Parchment Paper page and learned they were giving a $1.75 off coupon. $1.75 off parchment paper? That makes it just over a buck a roll at Wal-Mart. I'll take it.
So, if you're looking to save some money on your parchment paper for holiday baking (or just plain old every day baking) look here on Reynolds Parchment Paper page. Click on the banner on the right side of the page and you'll be able to print a coupon. Now, you'll have to install a coupon printer application in order to print the coupon. You can google it for yourself to decide if you want to do this. If you do install the application, then you'll be able to print the coupon twice (and that's twice per computer - so if you have access to more than one computer and install the coupon printer on each machine...do your own math)
So, if you're looking to save some money on your parchment paper for holiday baking (or just plain old every day baking) look here on Reynolds Parchment Paper page. Click on the banner on the right side of the page and you'll be able to print a coupon. Now, you'll have to install a coupon printer application in order to print the coupon. You can google it for yourself to decide if you want to do this. If you do install the application, then you'll be able to print the coupon twice (and that's twice per computer - so if you have access to more than one computer and install the coupon printer on each machine...do your own math)
Monday, October 13, 2008
Surely this is not surprising
I read this on Slashfood and have to say, I'm not surprised in the least. I mean, if Coke cleans your car battery terminals then this is not surprising...Diet Coke Prevents Pregnancy (by killing sperm on contact)
Friday, October 10, 2008
Oh, I need these!
 I'm planning on making Christmas gifts for friends this year. Kathie, cover your eyes. I was thinking about doing homemade s'mores - well, homemade marshmallows and graham crackers not homemade chocolate. Then, while cruising Food Gawker I came across a blog that featured these cookie cutters...I think I've GOT to have them! There are a couple of shops in my area that carry them, so I'll be looking for them and if I can't find them, I'm definitely ordering them online.
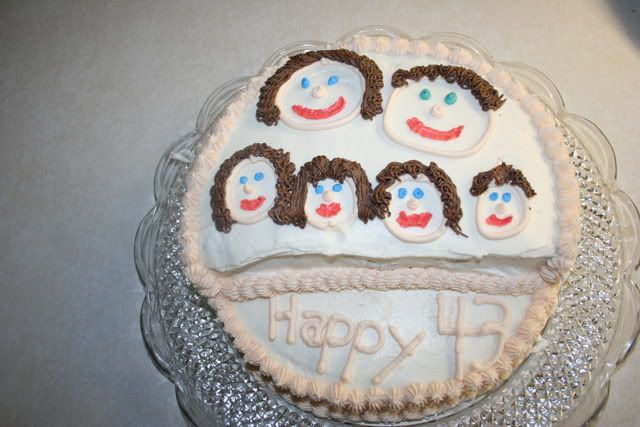 Now, if you know me, you know why these appeal to me - I have this total goofball sense of humor and these feed right into it (ha! that's funny and I wasn't trying to be..."feed right into it" and they're cookie cutters...get it?). Plus I have four kids who are always right under foot when I'm in the kitchen. I can well imagine one of my kids biting the arm, leg or head off any gingerbread men I'm trying to make as gifts. After all...you saw what happened to my birthday cake, right? Oh, you didn't? My two-year-old helped herself to about one-third of one of the layers while it was cooling so my cake ended up looking like this...
Yeah, that 1/3rd of a layer is gone due to the gnoshing of a two-year-old foodie. :) So, now do you see the appeal of the gingerbread men cookie cutters - at least their appeal to me?
Tuesday, October 7, 2008
I won!
I am so excited! I won a set of these trays (not sure if I won letters or numbers - won't know 'til I get them) from Blake Makes. Once they come in, I'll play with them and talk about them here. I'll definitely be using them for homeschool. If I get the numbers, we'll be able to do some great subtraction work, don't you think? ;)
Sunday, October 5, 2008
If it's Wednesday, we must be having pizza
Wednesdays are pretty much insane around here and since we have to be out the door by 5:45p.m. at the latest, I try to do simple and kid-friendly.
This past Wednesday I hit upon the idea of doing a homemade pizza. I knew I could throw the ingredients for dough into the bread machine and then roll it out. Don't hate me for using a bread machine, IMO it's not that different from throwing dough ingredients into the KitchenAid and letting it do all the work. AND, it allowed me to make dough and teach math. Anyway, I searched through my husband's bread machine cookbooks and found a recipe for Sourdough Pizza Crust. Oooooh, yummy! I have a sourdough starter in the fridge from about a month ago (it's really getting ripe and I'm loving it!) so I decided we'd give this a try. I loved it, so did the kids. We also made our own pizza sauce. Recipes for both follow.
Sourdough Pizza Crust
The Bread Machine Cookbook by Donna Rathmell German
This is the Large (2-pound) recipe
1 cup starter (recipe for starter can be found here)
3 Tablespoons olive oil
1 teaspoon salt
4 cups all-purpose flour
2 teaspoons yeast
water as needed
Put ingredients in bread machine in the order recommended by the manufacturer. My machine has a pizza dough cycle and I used it. Roll dough into a rectangle or circle, depending on the pan to be used. Place dough on pan and turn excess under, forming a raised edge. Brush very lightly with olive oil. Cover and let rise about 30 minutes. Top with pizza sauce and desired toppings. Place in a preheated 500(F) oven and bake until crust is brown and cheese melted, about 5 to 10 minutes.
I based our pizza sauce on the following recipe; but because my husband had used the spare can of diced tomatoes, I had to use tomato sauce and tomato paste.
Homemade Pizza Sauce
adapted from allrecipes.com
3 garlic cloves, minced {I used 4 cloves, we are a garlic-loving family}
3 tablespoons olive or vegetable oil {I used olive oil}
1 (29 ounce) can tomato puree {I used a 29-ounce can of tomato sauce}
1 (28 ounce) can crushed tomatoes {I used two 6-ounce cans of tomato paste}
2 tablespoons brown sugar
1 tablespoon Italian seasoning {I used didn't measure and used oregano and thyme}
1 teaspoon dried basil {I used more than a teaspoon}
1/2 teaspoon salt
1/2 teaspoon crushed red pepper flakes {I used a little less than this}
In a large saucepan, saute garlic in oil until tender. Stir in the remaining ingredients. Bring to a boil. Reduce heat; simmer, uncovered, for 30 minutes or until sauce reaches desired thickness. Use in Deep-Dish Sausage Pizza, Tomato Artichoke Chicken or any recipe that calls for pizza sauce. Sauce may be refrigerated for up to 1 week.
I cooked our pizza on the Pampered Chef 15-inch round stone dusted with cornmeal. I easily could've halved the dough and had plenty for a thinner-crust pizza. But, the thick sourdough crust was good, too. We made a simple mozzarella cheese pizza and put black olives on half of it (kids, you know - got to make them happy so they'll eat). This is definitely a "do again" - only next time I'll make two pizzas with the dough.
Saturday, September 27, 2008
Daring Bakers: Lavash Crackers and Vegan/Gluten Free Dip
I've been wanting to try my hand at crackers for a while now. And along came another Daring Bakers challenge to make me do just that!
Natalie from Gluten A Go Go, and co-host Shel, of Musings From the Fishbowl chose Lavash Crackers from Peter Reinhart's The Bread Baker's Apprentice. The Challenge: You can make the Lavash Crackers either with all purpose wheat flour or you can try making them gluten free. You may use any variety of spices/seeds/salt to top the crackers. All dips/spreads/relishes/salsas must be vegan and gluten free. I went with all-purpose flour and did a simple sesame seed and kosher salt topping on the crackers. My spread for them was hummus. I chose David Lebovitz's Cabbagetown Hummus Recipe and it was wonderful (recipe linked). Once again, my 4 year-old declared my efforts as "dee-yi-cious" and this time, my 7-month-old was able to partake (both crackers and hummus). I am definitely going to make these crackers again for Harrison's snacking enjoyment. And for the adults, I'm going to make some "Razorback Caviar" to serve with the crackers when I make them again. (recipe below)
Razorback Caviar with black-eye peas
2 cans (14-15 oz) black-eye peas without bacon, drained
1 can (14-15 oz) white hominy, drained
1 can (14-15oz) black beans, drained and rinsed
2 medium tomatoes, chopped
4 green onions, chopped
2 cloves garlic, minced
1 medium green bell pepper, finely chopped
1 jalapeno pepper, finely chopped
1/2 cup chopped onion
1/2 cup chopped fresh parsley
1 8oz bottle Italian salad dressing
1 can Rotel tomatoes, drained
Mix, refrigerate, serve.
This is a great recipe to use fat-free salad dressing in because there are so many other flavors going on you won't miss the fat in the dressing. :)
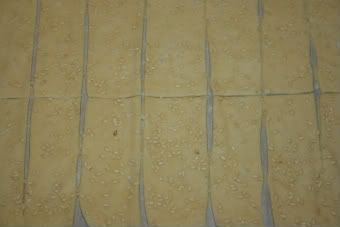
The Crackers:
I had to keep a close eye on the crackers once I put them in the oven - they browned very quickly but that's an issue with my oven not the recipe.
And here they are out of the oven: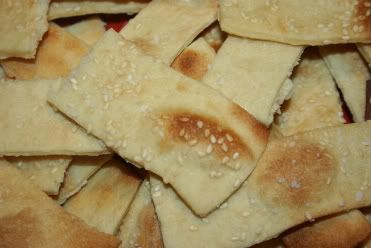
Natalie from Gluten A Go Go, and co-host Shel, of Musings From the Fishbowl chose Lavash Crackers from Peter Reinhart's The Bread Baker's Apprentice. The Challenge: You can make the Lavash Crackers either with all purpose wheat flour or you can try making them gluten free. You may use any variety of spices/seeds/salt to top the crackers. All dips/spreads/relishes/salsas must be vegan and gluten free. I went with all-purpose flour and did a simple sesame seed and kosher salt topping on the crackers. My spread for them was hummus. I chose David Lebovitz's Cabbagetown Hummus Recipe and it was wonderful (recipe linked). Once again, my 4 year-old declared my efforts as "dee-yi-cious" and this time, my 7-month-old was able to partake (both crackers and hummus). I am definitely going to make these crackers again for Harrison's snacking enjoyment. And for the adults, I'm going to make some "Razorback Caviar" to serve with the crackers when I make them again. (recipe below)
Razorback Caviar with black-eye peas
2 cans (14-15 oz) black-eye peas without bacon, drained
1 can (14-15 oz) white hominy, drained
1 can (14-15oz) black beans, drained and rinsed
2 medium tomatoes, chopped
4 green onions, chopped
2 cloves garlic, minced
1 medium green bell pepper, finely chopped
1 jalapeno pepper, finely chopped
1/2 cup chopped onion
1/2 cup chopped fresh parsley
1 8oz bottle Italian salad dressing
1 can Rotel tomatoes, drained
Mix, refrigerate, serve.
This is a great recipe to use fat-free salad dressing in because there are so many other flavors going on you won't miss the fat in the dressing. :)
The Crackers:
I had to keep a close eye on the crackers once I put them in the oven - they browned very quickly but that's an issue with my oven not the recipe.
Ready to go into the oven
And here they are out of the oven:
You can check out other Daring Bakers' Lavash Cracker and Vegan Dip (and I would if I were you - there were so many wonderful ideas and combinations). Many thanks to Natalie and Shel for a wonderful challenge!
Saturday, September 6, 2008
Amazon Grocery Sale
So, Amazon is having a grocery clearance sale - up to 55% off selected items. I was checking it out - if you need three pounds of decorating/sprinkling/sanding sugar, non-pareils or candied rose petals, check out the sale stuff from India Tree. I'm thinking I'd dig one of those *jars* and I really like that spring green sugar...but not enough to spend my entire $30 Amazon gift certificate on it. ;) I could go crazy buying stuff like that. I actually salivated when I read Joy, the Bakers' entry about Surfas. And I think I turned spring green with envy that she roamed the aisles there. ;)
My love of wandering through Williams-Sonoma and Kitchen Co. (a local kitchen store and cooking school) and The Rolling Pin (may it rest in peace) and a local restaurant supply store is what made me so giddy about my birthday gift from a friend last week. She gave me a new whisk (much needed), two sets of prep bowls (1 oz and 4oz sizes - love them), a bottle of vanilla beans and a wonderful book The Pastry Chef's Companion.
I'm alternating reading the birthday gift book and a book I've borrowed from the library: Vanilla : the cultural history of the world's most popular flavor and fragrance. The Vanilla book is absolutely fascinating. I've only finished the first chapter of Vanilla and have flipped through Pastry Chef's Companion, but can tell I'll be blogging from *both* of these books. The Pastry Chef's Companion has an entire section of classic and contemporary flavor combinations that I can't wait to comb through.
I have a batch of Lactation Boosting Cookies cookie dough in the fridge. I had pecan pieces left over from making cinnamon rolls a couple of weeks ago, so I threw them in. Yummy. I'm being a good girl and actually baking these cookies rather than just eating the dough.
We're making butter this afternoon. I'll blog about it later. It's a stunningly beautiful day today. After days of horribly high heat and then days upon days of Gustav hanging out over Arkansas (I think we had him longer than Louisiana did!) - I'm ready for sunshine and low temperatures and only 50% humidity. It is a glorious day!!!
Sunday, August 31, 2008
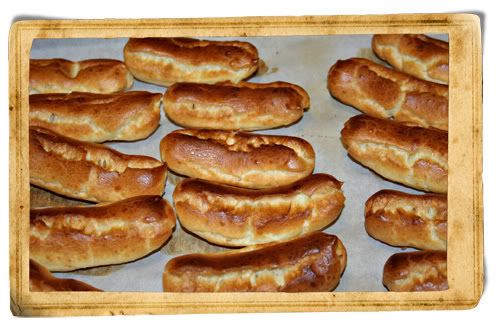
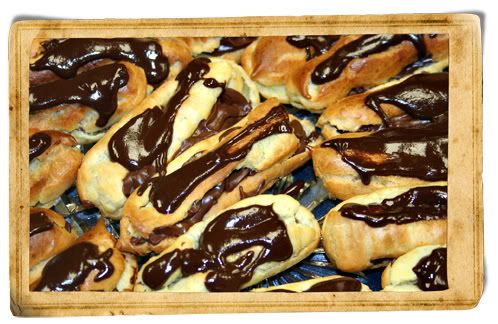
Daring Bakers: Chocolate Éclairs by Pierre Hermé
Our wonderful hosts for the Daring Bakers challenge this month were Tony Tahhan and MeetaK. You can find the recipes we used for this challenge on Tony's and Meeta's blogs.
Their challenge for us was the Chocolate Éclairs by Pierre Hermé with the following specifications:
I decided that since this is my first Daring Bakers Challenge I wasn't going to deviate. I elected to make both the chocolate pastry cream and the chocolate glaze. However, I have extra dough piped and in the freezer so I'm going to bake them and fill with vanilla pastry cream (I think I'll use Dorie Greenspan's vanilla pastry cream from Baking: From My Home to Yours).
I'll discuss in the order I made everything because I'll get confused otherwise. (hey, I have four kids five and under - I barely have a brain)
The Chocolate Sauce - this was really easy to make: chocolate, water, cream and sugar - boil, stir constantly, reduce heat, continue to stir until thickens. Easy peasy. My sauce separated some and I'm not sure what the deal was there - I don't *think* I overheated it; but this was the first time I'd made chocolate sauce, so I may have. It didn't taste burned or anything. :::shrug:::
The Chocolate Glaze - this one got me in trouble on Sunday morning because...um...well, my husband got up Sunday morning and wondered why the kitchen was so hot. I'd left the burner on all night long!!!! ACK! Thankfully our house didn't burn down. Since it called for 7 tablespoons of the chocolate sauce, I had to deal with the separation a little bit. More annoying than anything else - didn't seem to affect the taste and when I glazed the eclairs, they looked fine.
The Chocolate Pastry Cream - I managed to not scramble all of the yolks (yay!) I had a teeny bit of scrambling when I strained the mixture - hey, look ma! I can temper eggs (another thing Martha Stewart always intimidated me by doing). Brad had to help me because Harrison was flipping out and I had to calm him, plus get the chocolate melted (duh!). He did a great job of getting it to the point that it was ready for the ice water bath. This stuff...deadly yummy!
The Pâte à Choux - I'm not sure why I'd always let Martha intimidate me about pâte à choux - honestly, it wasn't difficult at all! It came together wonderfully and piped well, too. However, I've learned an important lesson - when you have a 2 year-old who likes to pull the knobs off the stove - make certain that when hubby puts them back on - he does it correctly. Translation - when you turn it to BAKE - make sure the BROILER isn't on. (duh!) I realized the error about 4 minutes in to the baking time and corrected it. It didn't seem to affect the choux all that much. It puffed wonderfully but the "broiled" ones got a little darker (not too dark, though).
Ready to eat...
The girls and Brad each tried an eclair before we left for Care Group and they declared them "delicious" (or, as Nin says "Dee-yi-shush!"). Everyone at Care Group said they were really good and several people had more than one. I came home with an empty platter. I'm glad I was able to have a little extra dough so I piped about a dozen more (this makes me think I didn't pipe the original ones "fat" enough) and they're in the freezer ready to bake!
Their challenge for us was the Chocolate Éclairs by Pierre Hermé with the following specifications:
- The dough used for the eclairs must be a pâte à choux from Pierre Hermé
- Keep one chocolate element in the challenge. Choose which chocolate element you want to keep. Then feel free to mix and match flavors to the base recipe.
I decided that since this is my first Daring Bakers Challenge I wasn't going to deviate. I elected to make both the chocolate pastry cream and the chocolate glaze. However, I have extra dough piped and in the freezer so I'm going to bake them and fill with vanilla pastry cream (I think I'll use Dorie Greenspan's vanilla pastry cream from Baking: From My Home to Yours).
I'll discuss in the order I made everything because I'll get confused otherwise. (hey, I have four kids five and under - I barely have a brain)
The Chocolate Sauce - this was really easy to make: chocolate, water, cream and sugar - boil, stir constantly, reduce heat, continue to stir until thickens. Easy peasy. My sauce separated some and I'm not sure what the deal was there - I don't *think* I overheated it; but this was the first time I'd made chocolate sauce, so I may have. It didn't taste burned or anything. :::shrug:::
The Chocolate Glaze - this one got me in trouble on Sunday morning because...um...well, my husband got up Sunday morning and wondered why the kitchen was so hot. I'd left the burner on all night long!!!! ACK! Thankfully our house didn't burn down. Since it called for 7 tablespoons of the chocolate sauce, I had to deal with the separation a little bit. More annoying than anything else - didn't seem to affect the taste and when I glazed the eclairs, they looked fine.
The Chocolate Pastry Cream - I managed to not scramble all of the yolks (yay!) I had a teeny bit of scrambling when I strained the mixture - hey, look ma! I can temper eggs (another thing Martha Stewart always intimidated me by doing). Brad had to help me because Harrison was flipping out and I had to calm him, plus get the chocolate melted (duh!). He did a great job of getting it to the point that it was ready for the ice water bath. This stuff...deadly yummy!
The Pâte à Choux - I'm not sure why I'd always let Martha intimidate me about pâte à choux - honestly, it wasn't difficult at all! It came together wonderfully and piped well, too. However, I've learned an important lesson - when you have a 2 year-old who likes to pull the knobs off the stove - make certain that when hubby puts them back on - he does it correctly. Translation - when you turn it to BAKE - make sure the BROILER isn't on. (duh!) I realized the error about 4 minutes in to the baking time and corrected it. It didn't seem to affect the choux all that much. It puffed wonderfully but the "broiled" ones got a little darker (not too dark, though).
Ready to eat...
The girls and Brad each tried an eclair before we left for Care Group and they declared them "delicious" (or, as Nin says "Dee-yi-shush!"). Everyone at Care Group said they were really good and several people had more than one. I came home with an empty platter. I'm glad I was able to have a little extra dough so I piped about a dozen more (this makes me think I didn't pipe the original ones "fat" enough) and they're in the freezer ready to bake!
Saturday, August 30, 2008
Sourdough Cinnamon Rolls
A couple of weeks ago I decided I'd get Brad's bread machine (collective gasp goes up around the baking world - how dare she?!) out of the garage. Hey, this is helping me work my way out of my fear of yeast breads, okay? Please don't beat me.
When we got the machine out, Elizabeth and I stirred up a sourdough starter and we've used it several times to make dough (which then got shaped and baked off in the oven - we've made sourdough French bread a couple of times - and the leftovers were used for French toast breakfast the next morning). Friday evening I made the dough for the Sourdough Cinnamon Rolls Elizabeth has been asking for since we made the starter. While I was nursing Harrison, Brad mixed up the filling for the cinnamon rolls (I'm so thankful I have a husband who will help like that) and I made the cinnamon rolls after I got BabyMan in bed. Elizabeth was thrilled to have cinnamon rolls Saturday morning for breakfast. I wish I had photos but I was at the office when they went into and came out of the oven. What follows are the recipes for the starter and the rolls. Both are from Better Homes & Gardens.
Sourdough Starter
1 1/2 teaspoons active dry yeast
3/4 cup warm water (105° to 115°F)
3 cups warm water (105° to 115°F)
3 cups all-purpose flour
4 teaspoons granulated sugar or brown sugar
To make starter: Dissolve yeast in the 3/4 cup warm water. Add the 3 cups warm water; stir in flour and sugar. Beat with an electric mixer on medium spead just until smooth. Cover with 100% cotton cheesecloth. Let stand at room temperature (75° to 85°F) for 5 to 10 days or until mixture has a sour, fermented aroma, stirring 2 or 3 times a day [or, if you're like me, whenever you remember "Oh yeah, I have some starter over there in the corner"]. A warmer rooms speeds the process. When the starter has fermented, transfer it to a 2-quart or larger plastic container with a tight fitting lid and refrigerate.
To use starter: Stir starter thoroughly after removing it from the refrigerator. Measure amount needed; bring to room temperature. The cold starter should be the consistency of buttermilk or thin pancake batter. If necessary, add water to thin the starter after it is stirred and before measuring.
For each cup of starter used, replenish remaining starter by stirring in 3/4 cup all-purpose flour, 3/4 cup water and 1 teaspoon granulated or brown sugar. Cover; let mixture stand at room temperature for at least 1 day or until bubbly. Refrigerate. If not used within 10 days, stir in 1 teaspoon granulated or brown sugar. Repeat every 10 days unless starter is replenished.
Sourdough Cinnamon Rolls
(this is for a 2-pound capacity machine)
1 1/3 cups Sourdough Starter
1/3 cup water
1 egg
1/4 cup honey
2 tablespoons butter
4 cups bread flour
1 teaspoon salt
1 3/4 teaspoons active dry yeast
2/3 cup chopped pecans (I'll leave these out next time due to a child's preference)
1/2 cup granulated sugar
3 tablespoons brown sugar
2 teaspoons ground cinnamon
3 tablespoons melted butter
1/3 cup whipping cream
Powdered Sugar Glaze (optional)
Add the first 8 ingredients to the machine accordin to the manufacturer's directions (for example, mine - as most do - have you add the salt with the liquid and the yeast with the flour - but the salt and yeast need to stay separate, initially). Select the dough cycle. When the cycle is complete, remove dough from machine. Punch down, cover and let rest for 10 minutes.
Meanwhile, for the filling, in a small mixing bowl stir together the pecans, sugars and cinnamon.
On a lightly floured surface, roll dough into an 18 x 12-inch rectangle. Brush with melted butter. Fill and roll, starting from a long side, seal edge. Cut into 18 slices; place cut side down in 2 greased 8x8x2-inch baking pans or 9x1 1/2-inch round baking pans. Cover and let rise in a warm place about 30 minutes or until nearly doubled. Drizzle whipping creamover rolls. Bake rolls in a 375° F oven for 20 - 25 minutes or until golden brown. Cool in pan about 5 minutes, invert onto a wire rack. Drizzle with Powdered Sugar Glaze, if desired.
Powdered Sugar Glaze
In a small mixing bowl stir together 1 cup sifted powdered sugar and 1/2 teaspoon vanilla. Stir in enough milk (1 to 2 tablespoons should be plenty) to make a glaze of drizzling consistency.
Monday, August 18, 2008
The Chewy - Alton Brown
One of my favorite episodes of Good Eats is the one where Alton makes three different types of chocolate chip cookies for his "sister." I love the science he covers in this particular show - the choice of "fat" for the cookie (butter, melted butter, or butter flavor shortening), the choice of flour (bread or AP), and the ratio of brown to white sugar all affect the outcome. And no where does he require that dough be chilled for something ridiculous like 36 hours.
I like chewy chocolate chip cookies. Thin and crispy are fine, puffy and cakey are my least favorite; but, ah, the chewy...makes my mouth water to think about them. I love them. I've been craving them lately and so I decided I'd make a batch of The Chewy. One cool thing - it calls for one egg plus one yolk. Well, the first egg I had sitting on the counter had apparently read the recipe and took care of that within itself. It was a double-yolked egg. My husband had used all the milk for the girls' cereal so I had a choice to make - buttermilk or heavy cream. Even though the recipe has baking soda in it, I went with the buttermilk. I would tell you whether or not it made a difference in the baked cookies; I would have pictures of the baked cookies for you...but...um...well...we ate the dough.
I know. Danger! Danger, Will Robinson! Salmonella!!! But it was so. good. Yummy sweet cream butter. Over a cup of brown sugar. Caramelly-flavored dough...mmmm....so. delicious. Hey, it wasn't just me as the other adult in my house definitely was dipping a spoon in the dough, too. The kids, however, were not. I would make sure they were asleep before I ate any dough because I didn't want to have to say "do as I say, not as I do." Actually I did bake nine cookies - three for each of the girls. I didn't take pictures because they barely got cooled before the girls snagged them and ran (smart girls).
And so, here is the recipe for my favorite chocolate chip cookie dough. I'm telling you, they are the. best. I don't care WHAT the NY Times says. THESE are the perfect chocolate chip cookies - but of course, they're Alton Brown's and what does he not do perfectly?
The Chewy
2 sticks unsalted butter
2 1/4 cups bread flour
1 teaspoon kosher salt
1 teaspoon baking soda
1/4 cup sugar
1 1/4 cups brown sugar
1 egg
1 egg yolk
2 tablespoons milk
1 1/2 teaspoons vanilla extract
2 cups semisweet chocolate chips
Hardware:
Ice cream scooper (#20 disher, to be exact) I use the medium scoop from Pampered Chef
Parchment paper
Baking sheets
Mixer
Heat oven to 375 degrees F.
Melt the butter in a heavy-bottom medium saucepan over low heat. Sift together the flour, salt, and baking soda and set aside.
Pour the melted butter in the mixer's work bowl. Add the sugar and brown sugar. Cream the butter and sugars on medium speed. Add the egg, yolk, 2 tablespoons milk and vanilla extract and mix until well combined. Slowly incorporate the flour mixture until thoroughly combined. Stir in the chocolate chips.
Chill the dough, then scoop onto parchment-lined baking sheets, 6 cookies per sheet. Bake for 14 minutes or until golden brown, checking the cookies after 5 minutes. Rotate the baking sheet for even browning. Cool completely and store in an airtight container.
Wednesday, July 30, 2008
Operation Baking GALS

Wednesday, July 23, 2008
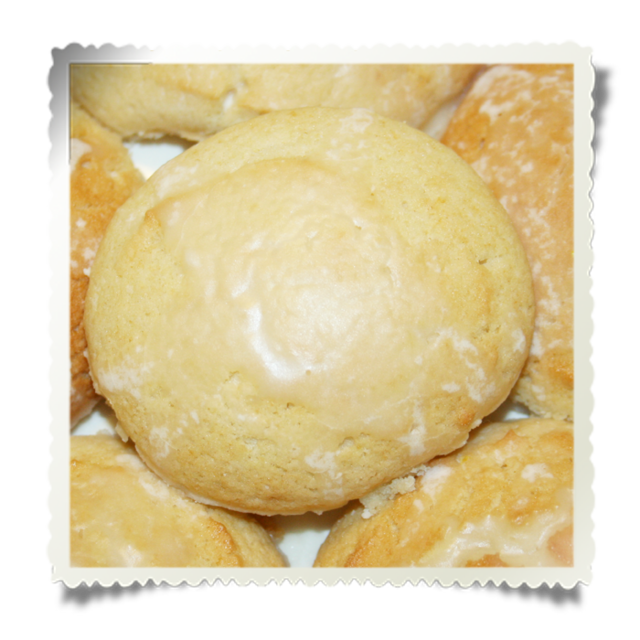
Buttermilk Cookies
Over the past week I've made homemade strawberry ice cream and coffee granita - both of which I meant to blog about but the busy-ness of life as the mother of four children, a wife, a full-time employee, a friend and a freelance mommy blogger caught up with me and the food blogging never happened.
However, the buttermilk cookies I made tonight are wonderful and must be blogged! Here I sit at 12:30a.m., tired as all get-out, but I've got to talk about these cookies! I bought buttermilk to make Dorie Greenspan's Devil's Food White Out Cake for my husband's birthday and so I was left with almost a quart of buttermilk. What in the world am I going to make besides pancakes? (By the way, can someone tell me the difference in Belgian Buttermilk and Cultured Buttermilk? Is it fat content alone? I googled it and didn't come up with anything, even after excluding anything that included the word "waffle" since I'm not looking for Buttermilk Belgian Waffles.) Anyway, I was wondering what I was going to make with all this leftover buttermilk when I saw this picture of Buttermilk Cookies on Foodgawker.
I visited Mandy's blog, and after looking at all her photos and reading her post about the cookies, I decided that I would give them a try. I finally got to it tonight. Oh. My. These aren't cookies, they're more like lemon cupcake tops! Delicious.
The dough for this is more like a quick bread than like any cookie dough I've ever worked with (thanks to the buttermilk and baking soda). It was springy and stretchy looking and it was good (yes, I eat cookie dough...I know I'm taking a salmonella risk). The recipe called for level tablespoons of dough to make the cookies; however, I love my medium scoop from Pampered Chef which is approximately 2 tablespoons. I decided to use it anyway and just watch the cookies closely. My oven really needs to be calibrated. No, wait, what my oven really needs is to be shot and put out of its misery. Anyway, I decided to risk it and make the cookies bigger. This decision made them seem all the more like lemon cupcake tops since they're about the circumference of a cupcake.
My two-year-old was awake and in the kitchen as I was pulling these out of the oven tonight (at 11:00 - she had a nap late this afternoon). I caught her once standing on the step-stool staring at the cookies..."Annie, don't eat one of those cookies, you've already brushed your teeth. Don't even touch them, okay?" So, she didn't eat one and she didn't touch it. At least not with her hand. She licked the edge of it. {sigh} I had to laugh - and made note of which cookie was hers so I could set it aside.
When I made the glaze for the cookies, I decided to put just a teeny bit of lemon zest in it. Not much, mind you, but just a smidge (as in 1/8th teaspoon kind of "smidge"). I'll be making these again. If you know a lemon dessert lover, these are excellent. I am going to make them again this weekend for Care Group; however, I'm going to do lime instead of lemon just because I'm a lime lover. I can't wait to make them again!
The recipe is from the January 2008 issue of Gourmet and is posted on their website - here. Since I followed the recipe exactly - other than the wee bit o'lemon zest in the glaze - I'll just link you to their site. Well, okay, I didn't follow it exactly...I didn't beat anything on "low speed" since I didn't use an electric mixer of any sort, I used my hand and a spatula. :) I didn't want to risk waking anyone with the hand mixer.
I have some freshly-caught salmon (filleted into steaks) in my freezer - anyone have suggestions on a great marinade before grilling them? Our neighbor went on a fishing excursion to Alaska and she gave us a couple of the steaks they filleted from some of the salmon she caught.
Edited post to add: My husband called from the office this morning and said, "Those cookies are good!" He rarely says things like that so I know they must be really, really good for Brad to say something about them tasting good. The girls each had one with breakfast. I figured it I'd thrown poppy seeds in them they'd have basically been lemon-poppy-seed muffin tops - so why not?
Monday, July 14, 2008
Homemade Marshmallows, a Family Affair
One of my girls' favorite snacks is marshmallows. They love those things. Well, the ones from the store are practically nothing but chemicals! I've seen homemade marshmallows several times in Martha Stewart Living and I've always thought, "someday I'd like to try doing that."
Well...someday finally arrived...
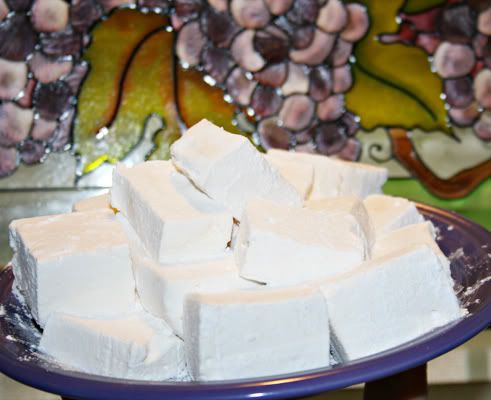 Saturday night after dinner, we made marshmallows. I say "we" because the entire family was involved in some way. Elizabeth sprinkled the gelatin on the water. Annie stuck her fingers in it to check it out. Katherine poured the salt and vanilla in while Brad was mixing. Brad was mixing because Harrison was screaming and only Mommy would do. On Sunday, after I'd cut the marshmallows, Elizabeth and Katherine rolled them in powdered sugar and piled them on the plate. It was a lot of fun! And...they taste great!
I'm not a big marshmallow fan, but these were good! And they were really good on s'mores. With the melted chocolate - yum! Elizabeth and I have decided that we're going to try making our own graham crackers and if we find a recipe for those that we like, then friends on our Christmas list will be getting S'more Marshmallows -- homemade marshmallows dipped in chocolate and then rolled in homemade graham cracker crumbs (friends and mommies of little girlfriends, pretend you didn't read that).
I took these to Care Group last night and everyone was very complimentary. One of the guys did tell me "Marshmallows are round and come in a bag - not square on a plate." So, just for Jon I may cut them with my round biscuit cutter next time and put some in a bag for him. ;) My husband agreed that they should be round and also thinks they need to be a little thinner - perhaps using a 9x13 pan next time. We're going to play around with them a few more times before we need to make them in earnest come December (at the very least, friends will be getting homemade marshmallows)
I used this recipe from Slashfoodwith a couple of minor modifications - we used an 8x8 square pan, we didn't have any corn starch to mix with the powdered sugar for dusting at the end and, we didn't "dust" our marshmallows we rolled 'em! I found that putting powdered sugar on the knife made the marshmallows easier to cut.
Well...someday finally arrived...
Saturday night after dinner, we made marshmallows. I say "we" because the entire family was involved in some way. Elizabeth sprinkled the gelatin on the water. Annie stuck her fingers in it to check it out. Katherine poured the salt and vanilla in while Brad was mixing. Brad was mixing because Harrison was screaming and only Mommy would do. On Sunday, after I'd cut the marshmallows, Elizabeth and Katherine rolled them in powdered sugar and piled them on the plate. It was a lot of fun! And...they taste great!I'm not a big marshmallow fan, but these were good! And they were really good on s'mores. With the melted chocolate - yum! Elizabeth and I have decided that we're going to try making our own graham crackers and if we find a recipe for those that we like, then friends on our Christmas list will be getting S'more Marshmallows -- homemade marshmallows dipped in chocolate and then rolled in homemade graham cracker crumbs (friends and mommies of little girlfriends, pretend you didn't read that).
I took these to Care Group last night and everyone was very complimentary. One of the guys did tell me "Marshmallows are round and come in a bag - not square on a plate." So, just for Jon I may cut them with my round biscuit cutter next time and put some in a bag for him. ;) My husband agreed that they should be round and also thinks they need to be a little thinner - perhaps using a 9x13 pan next time. We're going to play around with them a few more times before we need to make them in earnest come December (at the very least, friends will be getting homemade marshmallows)
I used this recipe from Slashfoodwith a couple of minor modifications - we used an 8x8 square pan, we didn't have any corn starch to mix with the powdered sugar for dusting at the end and, we didn't "dust" our marshmallows we rolled 'em! I found that putting powdered sugar on the knife made the marshmallows easier to cut.
Homemade Marshmallows
.75-oz unflavored gelatin (3 envelopes of Knox gelatin)
1/2 cup cold water
2 cups granulated sugar
2/3 cups light corn syrup
1/4 cup water
1/4 teaspoon salt
1 tablespoon vanilla extract
Line 9 x 9-inch pan with plastic wrap and lightly oil it. Set aside.
In the bowl of an electric mixer, sprinkle gelatin over 1/2 cup cold water. Soak for about 10 minutes.
Meanwhile, combine sugar, corn syrup and 1/4 cup water in a small saucepan. Bring the mixture to a rapid boil and boil hard for 1 minute.
Pour the boiling syrup into soaked gelatin and turn on the mixer, using the whisk attachment, to high speed. Add the salt and beat for 12 minutes. After 12 minutes, add in the vanilla extract beat to incorporate.
Scrape marshmallow into the prepared pan and spread evenly (Lightly greasing your hands and the spatula helps a lot here). Take another piece of lightly oiled plastic wrap and press lightly on top of the marshmallow, creating a seal. Let mixture sit for a few hours, or overnight, until cooled and firmly set.
In a shallow dish, combine equal parts cornstarch and confectioners' sugar. Remove marshmallow from pan and cut into equal pieces with scissors (the best tool for the job) or a chef's knife. Dredge each piece of marshmallow in confectioners' sugar mixture.
Store in an airtight container.
Wednesday, July 9, 2008
Vere Chocolate
About a month ago, Steph at Cupcake Project posted an interview with Vere Chocolate's owner, Kathy Moskal. She broke it up throughout the week and each day a lucky commenter won one of these...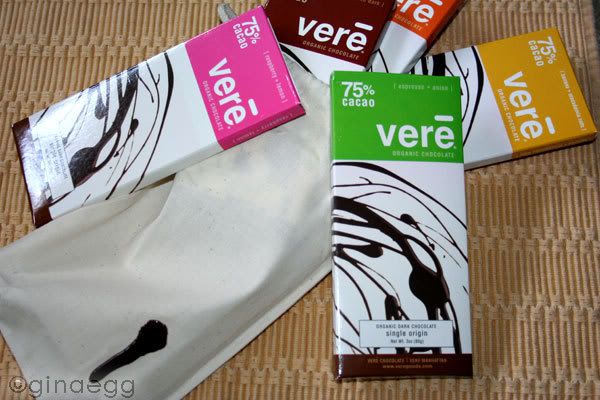
Yes, that's a bag of Vere Chocolate Bars. My initial shipment got lost in the mail and I didn't want Stef to think I was a slacker since, as a winner, I had promised to blog about what I thought of the chocolate. I let her know I had not received them and Kathy was kind enough to ship another set of the bars to me.
The bars arrived on Tuesday and were packaged to help protect them from the horrible Arkansas heat (it was in the upper 80s at 10:00 yesterday morning when they were delivered to my east-facing front porch). I saw the package as I was backing out of the driveway - thanks for knocking, DHL delivery man (she says, sarcastically). Hoping it was the chocolate, I parked the van in the middle of the street and I dashed to the porch to get the package. I was thrilled to see the return address label confirm that, yes, this was the Vere Chocolate. Ah, good chocolate - just the pick-me-up I needed as my four-year-old daughter had cut her own hair earlier that morning. I made myself wait until we got home from our errand to dive into the goodies.
I have to admit I did a double-take when I unwrapped the bag. My first thought was "Oh no! All that packaging to help protect it from the heat and there's melted chocolate on the bag!!" Then I felt the "melted chocolate" and thought, "Well, that feels weird." Um, that would be because it's not real chocolate. You got me, Kathy! Cute!
The first bar I tasted was the Cayenne + Cacao Nibs. I've heard many times of the combination of chocolate and peppers; having never tasted it, I was most curious. Also, another reason I was anxious to try this one, Kathy had mentioned in the interview that it was her favorite. Now I see what the draw is. Wow! The smoothness of the chocolate and then *pow!* the heat of the pepper - delicious. I gave my husband a small square (yes, I shared...some). He's not really a chocolate fan but even he was impressed. Ah, suddenly the DIY haircut wasn't so pressing on my mind. ;)
After dinner, I decided to try the Espresso + Anise bar. I love chocolate. I love coffee. I do not like licorice at all. However, this was a great chocolate bar. The licorice flavor was very slight and not at all overpowering. I like this one but it's not my favorite.
Of course I needed a "before bed snack" and the Raspberry + Lemon bar seemed like it would hit the spot. I broke off a few squares. I love raspberry. I like lemon. I thought the lemon overpowered the raspberry in this bar; however, I loved the raspberry seeds in the bar. Don't give me seedless raspberry anything, why bother? So I was glad to have the seeds. Loved it!
What could be a better thing for breakfast than banana? So, Banana + Macadamia Nut was my breakfast treat (before coffee so that I could really taste the chocolate). I shared some of it with my 2 year-old because she smiled so very sweetly and said 'please.' I'm not that mean of a mom - she's a cute kid! She wanted more. Um...no. Okay, maybe I am that mean of a mom even if she is a cute kid. I couldn't really taste the banana until I had quite a bit of chocolate in my mouth. I liked the bits of macadamia nuts rather than big nuts - I thought that worked better in the chocolate bar. I don't really like big hunks of stuff in my chocolate bars, anyway.
The Ultimo bar is just that - the ultimate. Plain, dark chocolate. And I don't mean plain as an insult. Plain and simple are *good* things sometimes and they're great things in the case of this chocolate. Smooth, delicious, bittersweet chocolate. And even better because it is organic.
Thanks to Stef for drawing my name out of the hat and a special thanks to Kathy for reshipping chocolate to me. I really enjoyed this!
Sunday, July 6, 2008
Devil's Food White Out Cake
I've been following many of the Tuesdays with Dorie bloggers and have been mesmerized by many of the goodies they've made. I decided to request the book they're using (Baking: From My Home to Yours) from my local library to see if it was something I wanted needed to add to my cookbook collection. Based on the Post-It(tm) tabs I have throughout the book, I'm thinking the answer is a resounding YES!
Of course, I was immediately attracted to the cake on the cover of the book:
I decided I would attempt my hand at it for Brad's birthday since we'd be celebrating on the 4th with my extended family. The recipe calls for 8-inch round cake pans and I only have 9-inch rounds, so I had to double the recipe in order to get the four layers. My filling layers aren't nearly as thick as hers either. Basically my entire cake isn't as pretty as hers. :) But hey, it certainly tasted good! This was my first experience in making a simple syrup and whipping egg whites. I think it turned out pretty well, considering!
It tasted wonderful, the cake was dense and fudgey (I refrigerated it). The frosting was sweet and almost like a marshmallow cream. My husband, kids, and the extended family seemed to love it. Because the recipe is online so many different places, I'm not going to post it here. Instead, I'll link to where it's posted at NPR online. Because I have a child who hates dark chocolate, I skipped the chocolate chips in my version of the cake. Still, it was yummilicious!
The only thing it was missing was the candles...


Of course, I was immediately attracted to the cake on the cover of the book:

I decided I would attempt my hand at it for Brad's birthday since we'd be celebrating on the 4th with my extended family. The recipe calls for 8-inch round cake pans and I only have 9-inch rounds, so I had to double the recipe in order to get the four layers. My filling layers aren't nearly as thick as hers either. Basically my entire cake isn't as pretty as hers. :) But hey, it certainly tasted good! This was my first experience in making a simple syrup and whipping egg whites. I think it turned out pretty well, considering!
It tasted wonderful, the cake was dense and fudgey (I refrigerated it). The frosting was sweet and almost like a marshmallow cream. My husband, kids, and the extended family seemed to love it. Because the recipe is online so many different places, I'm not going to post it here. Instead, I'll link to where it's posted at NPR online. Because I have a child who hates dark chocolate, I skipped the chocolate chips in my version of the cake. Still, it was yummilicious!
The only thing it was missing was the candles...
Saturday, July 5, 2008
Dollar Store Dining
I know that we're all looking for ways to decrease our food budget - but do you think buying food at the "dollar store" is the way to go? You know, the stores like Dollar Tree, Dollar General, Everything's a Buck, etc (whatever the ones in your area are called).
Our local paper did a story about a month ago about buying food stuffs at the dollar store - and the reporter seems to have done a lot of comparison shopping. She said on a recent trip to a specific store here in the city not one item was past or even near its expiration date, no dents and very few "off brands." And it wasn't all Top Ramen or potted meat. Now, she did provide the warning that you shouldn't assume that just because "it's only a dollar" and it's a name-brand then it must be a better deal than the same brand sold at the grocery store, Target or Wal-Mart.
Bad deals: Morton's kosher salt (1-pound box at the dollar store, $1; 3-pound box at Kroger, $2.49 and the store brand at Kroger is $1.49...for three pounds). Duncan Hines brownie and cookie mixes are smaller at the dollar stores (5 1/2 ounces rather than 16 1/2 ounce boxes sold at the grocery store). Other "skip its" she says are canned fruit as the cans are smaller and they are "off brands." And the tortillas are better suited to using as sandbags or weapons because they were so hard.
If you hate mincing your own garlic then the jars of the stuff at the dollar store are a good buy (8-ounce jar for $1; 4 1/2-ounce jar for $1.50 at the grocer). However, if you don't mind mincing your own, then buy the stuff in the produce section at Kroger where it's around $2/pound. Buying the heads of garlic at the grocery store also gives you cloves of garlic for other recipes. Minced stuff in the jar can only be used in recipes that call for...well...minced garlic. ;) (we use too much garlic for that to be a good buy for us)
She says the good buys are jars of red bell peppers (as a matter of fact, she bought almost all the stuff for an antipasto tray at the dollar store - olives, mushrooms, marinated vegetables, crackers), 24-ounce bottles of Hunt's ketchup, bread crumbs, chicken broth (I'm guessing that's if you don't buy low-sodium like I do); and 28-ounce cans of tomatoes; dried herbs and spices; seasoning mixes for the grill. Brad uses canned tomatoes when making his salsa (we really need to get some tomato plants!) so I'll send him to the dollar store the next time he gets a hankering to make some.
Things that are worth it if they're not on sale at the grocery store: the minced garlic previously mentioned, pasta, cooking oil, jam, jelly and preserves, long-grain white rice, soft drinks (3 cans for $1) and snack foods like chips and pretzels. My mom buys the bags of Tootsie Roll Midgies (that she stashes in her desk drawer) from the dollar store
What do you think about this "dollar store dining"?
Friday, June 20, 2008
Oatmeal, Chocolate-Chip & Flaxseed Cookies
These are Housepoet's Famous Oatmeal, Chocolate-Chip & Flaxseed Meal Lactation Boosting Cookies. The original was apparently posted on LiveJournal and housepoet is not a member there anymore from what I can tell. The recipe was posted on an online playgroup I visit and is legendary amongst breastfeeding moms - just google "lactation cookies" and see what I mean.
The cookies are basically a cowboy cookie that has no nuts but does have the addition of flaxseed meal and brewer's yeast that, along with the oatmeal, aid in milk production. Don't worry, if you're not lactating it won't make you spontaneously start doing so. If you are a breastfeeding mom, they say four cookies a day is the "magic number" for helping increase production. I...um...eat more than that a day - I love cookies. :) This cookie give a new meaning to the phrase "milk and cookies."
I've made this dough 10 times since Harrison was born 18 weeks ago, so you're getting all my notes in this post. I have a husband and two little girls "stealing" my cookies, too (actually, the husband just steals the dough - not the cookies - and oldest daughter doesn't like them). I've tried them with milk chocolate chips - they were okay, I prefer semi-sweet. I've also tried them with white chocolate chips - entirely too plain. Had I added almonds and Craisins with the white chocolate chips, I might've liked that - but I didn't have them on hand when I made that batch.
I like to make the dough and put it in the fridge, scoop out six cookies at a time to bake - then I eat them fresh from the oven. If I had a plate of six dozen cookies sitting around, they wouldn't last six days. I also like to freeze the scoops. That's worked really well, too.
She recommends baking them on parchment or a Silpat - these cookies need that. They will stick to the cookie sheet like crazy.
I buy the flaxseed meal, thick-cut/steel-cut oatmeal and brewer's yeast at Whole Foods. Please note - brewer's yeast is *not* the same as nutritional yeast. Also, don't buy the brewer's yeast tablets - buy the flakes/buds. (and if you're not lactating, you can leave the brewer's yeast out and still have a really good cookie - the flaxseed meal is good for you so you can leave it in).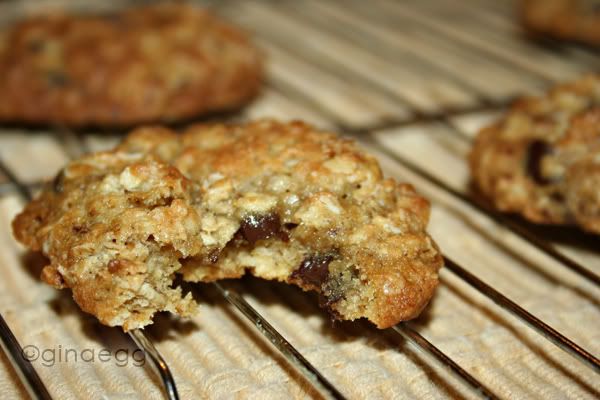
Housepoet's Famous Oatmeal, Chocolate-Chip & Flaxseed Cookies
2 Tablespoons flaxseed meal
4 Tablespoons water
1 cup butter, softened
1 cup granulated sugar
1 cup brown sugar
2 eggs
1 teaspoon vanilla
2 cups flour
1 teaspoon baking soda
1 teaspoon salt
2 Tablespoons brewer's yeast (be generous)
3 cups thick-cut oatmeal
1 cup - or more - chocolate chips
Preheat oven to 375-degrees (F).
In a small cup or bowl, combine flaxseed meal and water. Allow to sit 3-5 minutes.
Cream butter and sugars until well blended.
Add eggs, one at a time beating well after each one.
Stir in vanilla and flaxseed mixture.
Sift together flour, baking soda, salt and brewer's yeast. Add to butter mixture and mix well.
Add oats and chocolate chips.
Spoon or scoop onto a parchment- or Silpat-lined cookie sheet. Bake for 8-12 minutes at 375-degrees. The original recipe says the dough will be crumbly and so it helps to use a scoop. I don't ever find it to be crumbly, mine is actually soft and so I put it in the fridge for a couple of hours. I use the medium scoop from Pampered Chef to make my cookies - it's about 2 Tablespoons according to their product details. It makes the perfect size cookie if you ask me!
Coming soon...
I've decided I'm going to join the foodie blogosphere. Of course, "home" will always be My Egg-citing Life, but I'm going to use this blog for my baking and other cooking endeavors.
Subscribe to:
Posts (Atom)