Showing posts with label baking. Show all posts

Monday, July 27, 2009

Daring Bakers: Milan Cookies

The July Daring Bakers' challenge was hosted by Nicole at Sweet Tooth. She chose Chocolate Covered Marshmallow Cookies and Milan Cookies from pastry chef Gale Gand of the Food Network.
The challenge this month was to make one or both of the above listed cookies. Because of time constraints for the challenge deadline, I chose to do the Milan Cookies only but plan on doing the Chocolate-Covered Marshmallow Cookies at a later date (probably for Care Group in mid-August, as I usually try to coincide Daring Baker challenges with Care Group...somewhere to take the food so it won't end up around my waist!).

Usually I don't post the Daring Baker recipe because I'm not sure it's okay to have thousands of bakers posting the same recipe that typically comes out of a cookbook. However, this recipe is available on-line and so I'll link to it (above) and post it as well (below).

Now, for the part I know you're all waiting anxiously for... (I'm the chick in purple)
So, Gina, tell us, how was baking the Milan Cookies? It was oh. so. easy!
And, what were they like? Well, I thought they were a little soft because I only had bread flour. I was pleasantly surprised that they were not too lemony, especially with all that lemon extract! And someone at church said, "These are much better than the store-bought ones!" Since I'm pretty fond of the Pepperidge Farm version, I took that as a compliment. Oh, and I wanted to make mint Milan cookies, but I was unable to find spearmint oil for the chocolate ganache filling and was too lazy to drive all over looking for it. :)


Here are the baked cookies awaiting filling and sandwiching. Some are a little more done than I'd like but my oven leaves a lot to be desired in the calibration department. :) It's almost 30, I'm giving it a break (and hopefully the old heave-ho early next year!)

And here are the sandwiched cookies. The blue in the background would be my oldest daughter, ready to pounce. And then, she discovered I'd used semi-sweet chocolate...and she was truly bummed.


Prep Time:
20 min
Inactive Prep Time:
0 min
Cook Time:
1 hr 0 min

Level:
0

Serves:
about 3 dozen cookies (I made "mini" cookies and easily had twice that)

Ingredients

* 12 tablespoons butter, softened
* 2 1/2 cups powdered sugar
* 7/8 cup egg whites (from about 6 eggs)
* 2 tablespoons vanilla extract (yes, really two TABLESPOONS)
* 2 tablespoons lemon extract (yes, really two TABLESPOONS)
* 1 1/2 cups flour
* Cookie filling, recipe follows

Cookie filling:

* 1/2 cup heavy cream
* 8 ounces semisweet chocolate, chopped
* 1 orange, zested (I really dislike chocolate and orange, I skipped this)

Directions

Cream the butter with a paddle attachment then mix in the sugar. Add the egg whites gradually and then mix in the vanilla and lemon extracts. Add the flour and mix until just incorporated. With a small (1/4-inch) plain tip, pipe 1-inch sections of batter onto a parchment-lined sheet pan, spacing them 2 inches apart as they spread. Bake in a preheated 350 degree oven for 10 minutes or until light golden brown around the edges. Let cool on the pan.

Cookie Filling: In a small saucepan over medium flame, scald cream. Pour hot cream over chocolate in a bowl. Whisk to melt chocolate, add zest and blend well. Set aside to cool (the mixture will thicken as it cools). Spread a thin amount of the filling onto the flat side of a cookie while the filling is still soft and press the flat side of a second cookie on top. Repeat with the remainder of the cookies.

Saturday, June 27, 2009

Daring Bakers: Bakewell Tart...errrr...Pudding

The June Daring Bakers' challenge was hosted by Jasmine of Confessions of a Cardamom Addict and Annemarie of Ambrosia and Nectar. They chose a Traditional (UK) Bakewell Tart... er... pudding that was inspired by a rich baking history dating back to the 1800's in England.  The recipe will be posted on the host blogs.

In the recipe directions for the frangipane, it said:  "The batter may appear to curdle. In the words of Douglas Adams: Don’t panic. Really. It’ll be fine."  Um, yeah...you could say it curdles...


However, it bakes up wonderfully!  I used a raspberry preserves (because I like the seeds!!) and a wee bit of chocolate in the bottom of the tart...errr...pudding crust.  Katherine and I cut into it while it was still warm - it was okay but not making my heart throb.  I had another piece for breakfast on Thursday morning - loved it!  So did Nin and Natalie (our friend who comes over to spend the day with us while I work).  Annie didn't like the seeds in the raspberry preserves at all.


I'll definitely try making this again.  The pastry crust wasn't nearly as difficult to make as I was afraid it would be and I actually did quite well!  And hey! I finally got to use the tart pan that my friend Kathie gave me for my birthday last year!!!  :)  Fun!!!

Sunday, March 1, 2009

Daring Bakers: For the Love of Chocolate

The February 2009 challenge is hosted by Wendy of WMPE's blog and Dharm of Dad ~ Baker & Chef.
We have chosen a Chocolate Valentino cake by Chef Wan; a Vanilla Ice Cream recipe from Dharm and a Vanilla Ice Cream recipe from Wendy as the challenge.
Due to my being a total moron and mother of four children (three of whom have been sick over the past 10 days), we have photos of the cake but not the cake & ice cream.  :)  And like November's challenge, I enjoyed the main recipe so much, I made it more than once.
Cake:
Once again, the challenge for Daring Bakers comes to the rescue when I have to take dessert to a potluck dinner with Care Group friends.  We had dinner at Jon & Mandy's (paella, which was wonderful).  I made the cake with Ghirardelli 70% Cacao Extra Bittersweet bar and it was delicious.  This cake is chocolate, eggs and sugar - I mean, really now.  Let's talk about how light and moist and PERFECT it was (thank goodness. I'm always afraid I'll do this and take it to a dinner and have bombed on the recipe).  It *does need* something creamy to cut the richness of the chocolate - so if you make this (and DO! It's easy, it's fabulous), remember to serve it with whipped cream or ice cream.  The night we had it with friends, we served it with an all-natural, premium vanilla-bean ice cream.  I did it again, later in the month, to serve with the ice cream recipe I'd decided to use.   The important thing to remember about this recipe is that it is ALL about the chocolate you use to make it. Use cheap chocolate, it's going to taste like cheap chocolate.  Use the best chocolate you can get your hands on or afford.  Ghirardelli was my budget limit when I made it this month - however, if I can get my hands on a pound of Amano....mmmmmm, THAT would be a most awesome cake.  (let me channel Bill & Ted here for a minute)
Ice cream: (no photo available thanks to the distraction of sick little Eggs) Brad and I received a Donvier Ice Cream Maker as a wedding gift and we've used it - oh, maybe five times in the past 19 years - errrr...um.... - 18 years, 363 days ;) .  However, I've never gotten rid of it.  This past summer, though, I did break it out again and make ice cream with the girls.  We had great luck with the French Vanilla Ice Cream recipe that came in the instruction booklet for the maker. So, I elected to make that again. 
French Vanilla Ice Cream
3 eggs . . . . . . . . . . . . . . . . . . . . . . . . . . .3
1 cup sugar . . . . . . . . . . . . . . . . . . . . .250 ml
2 cups light cream . . . . . . . . . . . . . . . .500 ml
2 cups milk . . . . . . . . . . . . . . . . . . . . .500 ml
2 tsp vanilla . . . . . . . . . . . . . . . . . . . . . .10 ml
Beat eggs and milk together in a large saucepan.
Add sugar. Cook over low heat, stirring
constantly until thickened (approx. 10 min).
Mixture should smoothly coat the spoon.
Cool, then add cream and vanilla. Refrigerate
overnight. Makes about 1Qt/.9L.
A delicious, delicious month to be a Daring Baker.  Thanks to our wonderful hosts this month!

Monday, February 16, 2009

It's a Birthday Party!

My youngest child - my first and only (and last, to quote my husband) son - turned one on Sunday.  We had his party on Saturday.  It was a hopping party - but that's because it was a frog-themed party more than anything else.  I had decided when he was just a wee one that we would do the frog theme.  I searched Wilton's website for frog ideas.  I elected to go with this cake - hoping I'd be able to do it without losing my religion in the process.  I mean, what fun is your kiddo's birthday party if you're stressed out about the cake?!  None!!!  Since I'd recently done Elizabeth's Hannah Montana electric guitar cake, I thought I could surely do this one. :) 

He's not perfect, but he was cute enough to make me feel like I had done what I'd set out to do.  I'll also know what I need to do differently when I make the cake again for my youngest daughter's fourth birthday in December (she loves froggies!).

My week was insane and at the last minute I decided to just go with a cake mix - Pillsbury Strawberry (my kids love it).  Frosting is the Wilton Vanilla Buttercream but I use real Bourbon Vanilla Extract instead of the imitation clear vanilla.

Since we'd invited almost 40 people, I wanted to make certain we had enough cake to go around, just in case everyone showed up.  So, I also made some cupcakes...from scratch.  I was going to make the Caramel Cake cupcakes but didn't have enough caramel syrup in the fridge and since it was two-and-a-half hours until the party I needed something quick. I decided to go with Magnolia Bakery's Vanilla Cupcakes.  I'd had them before and I knew they'd be perfect.  They were.  I frosted them literally minutes before we walked out the door.  I'd forgotten that the last tip I'd used with the kelly green frosting was the grass tip - so we ended up with one "chia cupcake" (my kids didn't get it, but all the adults thought it was funny). 

The birthday boy loved his cake and cupcakes.  He had a little of each - along with some vanilla and some strawberry ice cream! 

Wednesday, January 14, 2009

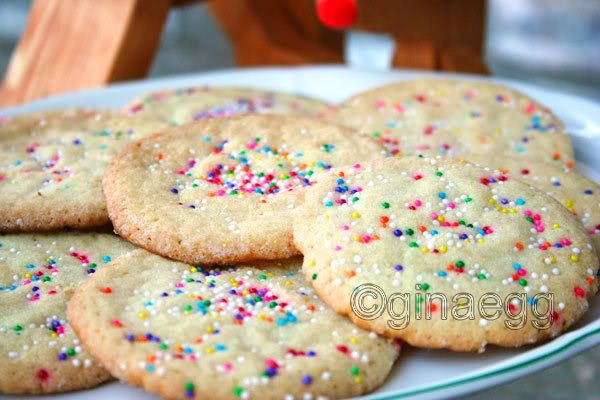
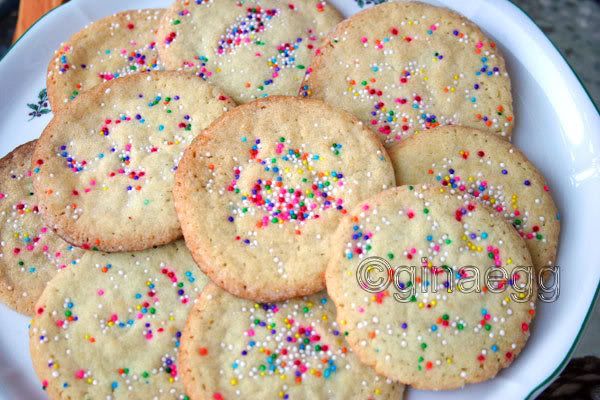
Grammie's Sugar Cookies

Almost every Christmas since we've been married, my husband has made his mom's sugar cookies.  They are a big favorite - crisp, melt-in-your-mouth cookies.  They are my kids' favorite cookies. Harrison actually squeals when he sees them.  We took them to a Girl Scout meeting one night and sixty cookies were gone in no time.  Brad gets "requests" for three things:  his chicken fajitas, his salsa, these cookies.  Only one of them has a recipe I can share - the other two are those "Open the cabinets and see what looks good today" kind of concoctions.

 Sugar Cookies
1 cup powdered sugar
1 cup granulated sugar
1 cup butter or margarine
1 cup vegetable oil
2 eggs
1 tsp vanilla
4 cups plus 4 heaping Tbsp all-purpose flour
1 tsp salt
1 tsp baking soda
1 tsp cream of tartar


  • Cream together the sugars, butter and oil until light and fluffy.
  • Beat in eggs and vanilla.
  • Sift together the remaining ingredients.  Add to wet mixture and mix well.
  • Roll into small balls and place on ungreased cookie sheets.   (I usually refrigerate it for about an hour before I do this because it's so sticky)
  • Press down cookies with a glass dipped in sugar and then decorate with sugar sprinkles or non-periels.
  • Bake in 375° oven about 10 minutes until golden brown.
Personally, I like these cookies after they've cooled, because they crisp up nicely.  These cookies are so crispy they'll practically disenegrate if you look  at them wrong.  So, store them in an airtight container and don't try to ship them anywhere or the recipient will thank you for sending them sugar cookie powder. 

Saturday, November 29, 2008

Daring Bakers: Caramel Cake with Browned Butter-Caramel Icing

edited to add: Pilgrims and Indians were made by my oldest daughter and me a couple of years ago (when she was three). I got the idea out of Family Fun magazine (my favorite magazine on the planet, I think). You can find them here should you wish to recreate for your own table next year. :)

Oh. My. I love the flavor of caramel and I like browned butter - combine the two - and well, as my 4-year-old says, "It was deee-yi-cious!!" The Daring Bakers had a great challenge for November. Just ask my waistline!

Dolores of Culinary Curiosity was our host this month. Co-hosts were Alex (Brownie of the Blondie and Brownie duo), Jenny of Foray into Food. And Natalie of Gluten-a-Go-Go was the go-to-girl for info on alternative baking.

Our hosts this month chose Shuna Fish Lydon's signature caramel cake (this is where you'll find the recipe for the cake -- QUICK -- GO THERE! You want to make this cake!!!!) We also had an optional challenge: Alice Medrich’s Golden Vanilla Bean Caramels which I did not do since it was optional and my life is insane at the moment.

The first step in making this cake is to make a caramel syrup. This requires cooking sugar and water on the stove, waiting for it to turn an amber color and then pouring cold water into it. The recipe warns of splatters. I am (a) chicken of splatters (which is yet another reason we never have fried food in this house - I cook my bacon in the oven) and (b) often surrounded by little people when I'm in the kitchen. The idea of something hot and sticky splattering everywhere, when two of my little people recently ended up with 2nd degree burns thanks to hot tea....not something I was looking forward to. However, one of the other Daring Bakers, Linda, shared a tip about making the caramel syrup:
When I was ready to pour the water into the bubbling caramel syrup, I took a piece of aluminum foil, cut a quarter-sized hole in the center and placed it over the pot of boiling syrup. Then I slowly poured the cold water through the hole. Worked like a charm. Not a splatter outside the pan or on my hand.
I used that tip and it was definitely a great one, especially since Elizabeth and Annie were in the kitchen with me while I was making it.

I made this cake for dinner with three other couples and it was well received. I have to admit being very nervous as I'd not tasted it before. When I cut it at Janet's I dished some onto a plate and said, "Let me take a bite of this before you give any other pieces out! If I messed it up, we'll eat the apple pie Teresa brought!" But...mmmm...good cake! Dense, moist - very good. The icing was rich but not too sweet. No photos and we devoured the cake, then what was left over, my girls had for breakfast on Saturday morning. (yeah, cake for breakfast -- but then their morning snack was no-sugar-added organic applesauce so we made up for it)


I'd also volunteered to take a dessert to choir retreat at the church on Saturday (our church choir spends one day hammering out Christmas music in order to not have to add additional rehearsals during the holiday season). After tasting the cake I decided I'd do the same recipe as cupcakes. The recipe made 21 cupcakes - perfect! 18 for choir retreat and one for each of my girls. I filled the cupcake liners two-thirds full, baked them at 350 for about 13 minutes. They were delicious! I will definitely be making this cake again. And again. And again! Even my husband, who doesn't really like cake, liked it!

Be sure to check out how other Daring Bakers fared - and I know some make the caramel candies, too. Mmmm! You'll definitely want to check that out!

Sunday, October 19, 2008

Parchment Paper on the cheap!

I love to bake, remember (see up there in the header in case you've forgotten - my favorite line from High School Musical).  So, one day while reading some of the blogs I stalk I found a link to Reynolds' Parchment Paper page and learned they were giving a $1.75 off coupon.  $1.75 off parchment paper?  That makes it just over a buck a roll at Wal-Mart.  I'll take it.

So, if you're looking to save some money on your parchment paper for holiday baking (or just plain old every day baking) look here on Reynolds Parchment Paper page.  Click on the banner on the right side of the page and you'll be able to print a coupon.  Now, you'll have to install a coupon printer application in order to print the coupon.  You can google it for yourself to decide if you want to do this. If you do install the application, then you'll be able to print the coupon twice (and that's twice per computer - so if you have access to more than one computer and install the coupon printer on each machine...do your own math)

Sunday, August 31, 2008

Daring Bakers: Chocolate Éclairs by Pierre Hermé

Our wonderful hosts for the Daring Bakers challenge this month were Tony Tahhan and MeetaK. You can find the recipes we used for this challenge on Tony's and Meeta's blogs.

Their challenge for us was the Chocolate Éclairs by Pierre Hermé with the following specifications:
  • The dough used for the eclairs must be a pâte à choux from Pierre Hermé
  • Keep one chocolate element in the challenge. Choose which chocolate element you want to keep. Then feel free to mix and match flavors to the base recipe.
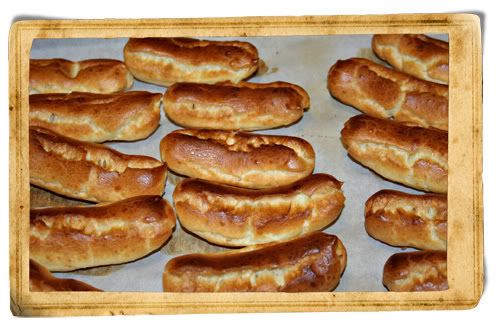
Ready to fill...

I decided that since this is my first  Daring Bakers Challenge I wasn't going to deviate.  I elected to make both the chocolate pastry cream and the chocolate glaze.  However, I have extra dough piped and in the freezer so I'm going to bake them and fill with vanilla pastry cream (I think I'll use Dorie Greenspan's vanilla pastry cream from Baking: From My Home to Yours).

I'll discuss in the order I made everything because I'll get confused otherwise. (hey, I have four kids five and under - I barely have a brain)

The Chocolate Sauce - this was really easy to make: chocolate, water, cream and sugar - boil, stir constantly, reduce heat, continue to stir until thickens.  Easy peasy.  My sauce separated some and I'm not sure what the deal was there - I don't *think* I overheated it; but this was the first time I'd made chocolate sauce, so I may have. It didn't taste burned or anything.  :::shrug::: 

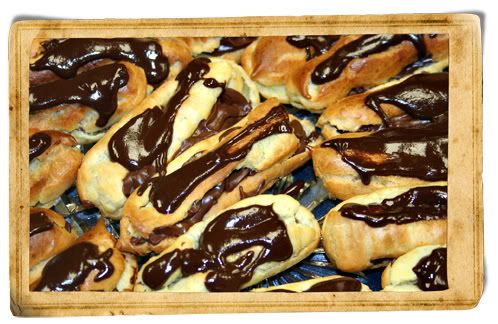
The Chocolate Glaze -  this one got me in trouble on Sunday morning because...um...well, my husband got up Sunday morning and wondered why the kitchen was so hot.  I'd left the burner on all night long!!!! ACK!  Thankfully our house didn't burn down.  Since it called for 7 tablespoons of the chocolate sauce, I had to deal with the separation a little bit. More annoying than anything else - didn't seem to affect the taste and when I glazed the eclairs, they looked fine.

The Chocolate Pastry Cream - I managed to not scramble all of the yolks (yay!)  I had a teeny bit of scrambling when I strained the mixture - hey, look ma! I can temper eggs (another thing Martha Stewart always intimidated me by doing).  Brad had to help me because Harrison was flipping out and I had to calm him, plus get the chocolate melted (duh!).  He did a great job of getting it to the point that it was ready for the ice water bath.  This stuff...deadly yummy! 


The Pâte à Choux - I'm not sure why I'd always let Martha intimidate me about pâte à choux - honestly, it wasn't difficult at all!  It came together wonderfully and piped well, too.  However, I've learned an important lesson - when you have a 2 year-old who likes to pull the knobs off the stove - make certain that when hubby puts them back on - he does it correctly.  Translation - when you turn it to BAKE - make sure the BROILER isn't on.  (duh!)  I realized the error about 4 minutes in to the baking time and corrected it.  It didn't seem to affect the choux all that much.  It puffed wonderfully but the "broiled" ones got a little darker (not too dark, though).


Ready to eat...


The girls and Brad each tried an eclair before we left for Care Group and they declared them "delicious" (or, as Nin says "Dee-yi-shush!").  Everyone at Care Group said they were really good and several people had more than one.  I came home with an empty platter.  I'm glad I was able to have a little extra dough so I piped about a dozen more (this makes me think I didn't pipe the original ones "fat" enough) and they're in the freezer ready to bake!

Saturday, August 30, 2008

Sourdough Cinnamon Rolls

A couple of weeks ago I decided I'd get Brad's bread machine (collective gasp goes up around the baking world - how dare she?!) out of the garage. Hey, this is helping me work my way out of my fear of yeast breads, okay? Please don't beat me.

When we got the machine out,
Elizabeth and I stirred up a sourdough starter and we've used it several times to make dough (which then got shaped and baked off in the oven - we've made sourdough French bread a couple of times - and the leftovers were used for French toast breakfast the next morning). Friday evening I made the dough for the Sourdough Cinnamon Rolls Elizabeth has been asking for since we made the starter. While I was nursing Harrison, Brad mixed up the filling for the cinnamon rolls (I'm so thankful I have a husband who will help like that) and I made the cinnamon rolls after I got BabyMan in bed. Elizabeth was thrilled to have cinnamon rolls Saturday morning for breakfast. I wish I had photos but I was at the office when they went into and came out of the oven. What follows are the recipes for the starter and the rolls. Both are from Better Homes & Gardens.


Sourdough Starter
1 1/2 teaspoons active dry yeast
3/4 cup warm water (105° to 115°F)
3 cups warm water (105° to 115°F)
3 cups all-purpose flour
4 teaspoons granulated sugar or brown sugar


To make starter: Dissolve yeast in the 3/4 cup warm water. Add the 3 cups warm water; stir in flour and sugar. Beat with an electric mixer on medium spead just until smooth. Cover with 100% cotton cheesecloth. Let stand at room temperature (75° to 85°F) for 5 to 10 days or until mixture has a sour, fermented aroma, stirring 2 or 3 times a day [or, if you're like me, whenever you remember "Oh yeah, I have some starter over there in the corner"]. A warmer rooms speeds the process. When the starter has fermented, transfer it to a 2-quart or larger plastic container with a tight fitting lid and refrigerate.

To use starter: Stir starter thoroughly after removing it from the refrigerator. Measure amount needed; bring to room temperature. The cold starter should be the consistency of buttermilk or thin pancake batter. If necessary, add water to thin the starter after it is stirred and before measuring.

For each cup of starter used, replenish remaining starter by stirring in 3/4 cup all-purpose flour, 3/4 cup water and 1 teaspoon granulated or brown sugar. Cover; let mixture stand at room temperature for at least 1 day or until bubbly. Refrigerate. If not used within 10 days, stir in 1 teaspoon granulated or brown sugar. Repeat every 10 days unless starter is replenished.

Sourdough Cinnamon Rolls
(this is for a 2-pound capacity machine)
1 1/3 cups Sourdough Starter
1/3 cup water
1 egg
1/4 cup honey
2 tablespoons butter
4 cups bread flour
1 teaspoon salt
1 3/4 teaspoons active dry yeast
2/3 cup chopped pecans (I'll leave these out next time due to a child's preference)
1/2 cup granulated sugar
3 tablespoons brown sugar
2 teaspoons ground cinnamon
3 tablespoons melted butter
1/3 cup whipping cream
Powdered Sugar Glaze (optional)

Add the first 8 ingredients to the machine accordin to the manufacturer's directions (for example, mine - as most do - have you add the salt with the liquid and the yeast with the flour - but the salt and yeast need to stay separate, initially). Select the dough cycle. When the cycle is complete, remove dough from machine. Punch down, cover and let rest for 10 minutes.

Meanwhile, for the filling, in a small mixing bowl stir together the pecans, sugars and cinnamon.

On a lightly floured surface, roll dough into an 18 x 12-inch rectangle. Brush with melted butter. Fill and roll, starting from a long side, seal edge. Cut into 18 slices; place cut side down in 2 greased 8x8x2-inch baking pans or 9x1 1/2-inch round baking pans. Cover and let rise in a warm place about 30 minutes or until nearly doubled. Drizzle whipping creamover rolls. Bake rolls in a 375° F oven for 20 - 25 minutes or until golden brown. Cool in pan about 5 minutes, invert onto a wire rack. Drizzle with Powdered Sugar Glaze, if desired.

Powdered Sugar Glaze
In a small mixing bowl stir together 1 cup sifted powdered sugar and 1/2 teaspoon vanilla. Stir in enough milk (1 to 2 tablespoons should be plenty) to make a glaze of drizzling consistency.

Monday, August 18, 2008

The Chewy - Alton Brown

One of my favorite episodes of Good Eats is the one where Alton makes three different types of chocolate chip cookies for his "sister."  I love the science he covers in this particular show - the choice of "fat" for the cookie (butter, melted butter, or butter flavor shortening), the choice of flour (bread or AP), and the ratio of brown to white sugar all affect the outcome.  And no where does he require that dough be chilled for something ridiculous like 36 hours.

I like chewy chocolate chip cookies.  Thin and crispy are fine, puffy and cakey are my least favorite; but, ah, the chewy...makes my mouth water to think about them. I love them.  I've been craving them lately and so I decided I'd make a batch of The Chewy.  One cool thing - it calls for one egg plus one yolk.  Well, the first egg I had sitting on the counter had apparently read the recipe and took care of that within itself. It was a double-yolked egg.  My husband had used all the milk for the girls' cereal so I had a choice to make - buttermilk or heavy cream.  Even though the recipe has baking soda in it, I went with the buttermilk.  I would tell you whether or not it made a difference in the baked cookies; I would have pictures of the baked cookies for you...but...um...well...we ate the dough.

I know.  Danger! Danger, Will Robinson! Salmonella!!!  But it was so. good.  Yummy sweet cream butter.  Over a cup of brown sugar. Caramelly-flavored dough...mmmm....so. delicious.  Hey, it wasn't just me as the other adult in my house definitely was dipping a spoon in the dough, too.  The kids, however, were not.  I would make sure they were asleep before I ate any dough because I didn't want to have to say "do as I say, not as I do."   Actually I did bake nine cookies - three for each of the girls.  I didn't take pictures because they barely got cooled before the girls snagged them and ran (smart girls).


And so, here is the recipe for my favorite chocolate chip cookie dough.  I'm telling you, they are the. best. I don't care WHAT the NY Times saysTHESE are the perfect chocolate chip cookies - but of course, they're Alton Brown's and what does he not do perfectly? 

The Chewy
2 sticks unsalted butter
2 1/4 cups bread flour
1 teaspoon kosher salt
1 teaspoon baking soda
1/4 cup sugar
1 1/4 cups brown sugar
1 egg
1 egg yolk
2 tablespoons milk
1 1/2 teaspoons vanilla extract
2 cups semisweet chocolate chips
 

Hardware:  
Ice cream scooper (#20 disher, to be exact) I use the medium scoop from Pampered Chef
Parchment paper
Baking sheets
Mixer


Heat oven to 375 degrees F.
Melt the butter in a heavy-bottom medium saucepan over low heat. Sift together the flour, salt, and baking soda and set aside.
Pour the melted butter in the mixer's work bowl. Add the sugar and brown sugar. Cream the butter and sugars on medium speed. Add the egg, yolk, 2 tablespoons milk and vanilla extract and mix until well combined. Slowly incorporate the flour mixture until thoroughly combined. Stir in the chocolate chips.
Chill the dough, then scoop onto parchment-lined baking sheets, 6 cookies per sheet. Bake for 14 minutes or until golden brown, checking the cookies after 5 minutes. Rotate the baking sheet for even browning. Cool completely and store in an airtight container.

Wednesday, July 30, 2008

Operation Baking GALS

This weekend my girls and I are going to be baking cookies and then on Monday - on my way to the office - I'll be dropping off a package at the post office -- those cookies are going to Iraq as part of Operation Baking GALS (Give a Little Support....Bake!)  You can read more about it and sign-up to participate here.

Wednesday, July 23, 2008

Buttermilk Cookies

Over the past week I've made homemade strawberry ice cream and coffee granita - both of which I meant to blog about but the busy-ness of life as the mother of four children, a wife, a full-time employee, a friend and a freelance mommy blogger caught up with me and the food blogging never happened.


However, the buttermilk cookies I made tonight are wonderful and must be blogged!  Here I sit at 12:30a.m., tired as all get-out, but I've got to talk about these cookies!  I bought buttermilk to make Dorie Greenspan's Devil's Food White Out Cake for my husband's birthday and so I was left with almost a quart of buttermilk.  What in the world am I going to make besides pancakes?  (By the way, can someone tell me the difference in Belgian Buttermilk and Cultured Buttermilk?  Is it fat content alone?  I googled it and didn't come up with anything, even after excluding anything that included the word "waffle" since I'm not looking for Buttermilk Belgian Waffles.) Anyway, I was wondering what I was going to make with all this leftover buttermilk when I saw this picture of Buttermilk Cookies on Foodgawker.

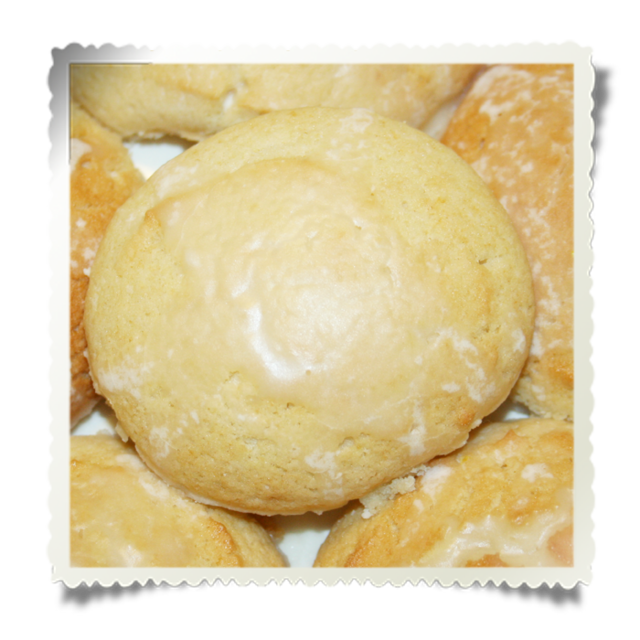
I visited Mandy's blog, and after looking at all her photos and reading her post about the cookies, I decided that I would give them a try.  I finally got to it tonight.  Oh. My. These aren't cookies, they're more like lemon cupcake tops! Delicious.

The dough for this is more like a quick bread than like any cookie dough I've ever worked with (thanks to the buttermilk and baking soda).  It was springy and stretchy looking and it was good (yes, I eat cookie dough...I know I'm taking a salmonella risk).  The recipe called for level tablespoons of dough to make the cookies; however, I love my medium scoop from Pampered Chef which is approximately 2 tablespoons.  I decided to use it anyway and just watch the cookies closely.  My oven really needs to be calibrated. No, wait, what my oven really needs is to be shot and put out of its misery.  Anyway, I decided to risk it and make the cookies bigger.  This decision made them seem all the more like lemon cupcake tops since they're about the circumference of a cupcake.

My two-year-old was awake and in the kitchen as I was pulling these out of the oven tonight (at 11:00 - she had a nap late this afternoon). I caught her once standing on the step-stool staring at the cookies..."Annie, don't eat one of those cookies, you've already brushed your teeth. Don't even touch them, okay?"  So, she didn't eat one and she didn't touch it. At least not with her hand. She licked the edge of it.  {sigh}  I had to laugh - and made note of which cookie was hers so I could set it aside.

When I made the glaze for the cookies, I decided to put just a teeny bit of lemon zest in it.  Not much, mind you, but just a smidge (as in 1/8th teaspoon kind of "smidge"). I'll be making these again.  If you know a lemon dessert lover, these are excellent.  I am going to make them again this weekend for Care Group; however, I'm going to do lime instead of lemon just because I'm a lime lover. I can't wait to make them again!

The recipe is from the January 2008 issue of Gourmet and is posted on their website - here. Since I followed the recipe exactly - other than the wee bit o'lemon zest in the glaze - I'll just link you to their site.  Well, okay, I didn't follow it exactly...I didn't beat anything on "low speed" since I didn't use an electric mixer of any sort, I used my hand and a spatula.  :) I didn't want to risk waking anyone with the hand mixer. 

I have some freshly-caught salmon (filleted into steaks) in my freezer - anyone have suggestions on a great marinade before grilling them?  Our neighbor went on a fishing excursion to Alaska and she gave us a couple of the steaks they filleted from some of the salmon she caught.

Edited post to add: My husband called from the office this morning and said, "Those cookies are good!" He rarely says things like that so I know they must be really, really good  for Brad to say something about them tasting good.  The girls each had one with breakfast.  I figured it I'd thrown poppy seeds in them they'd have basically been lemon-poppy-seed muffin tops - so why not?